
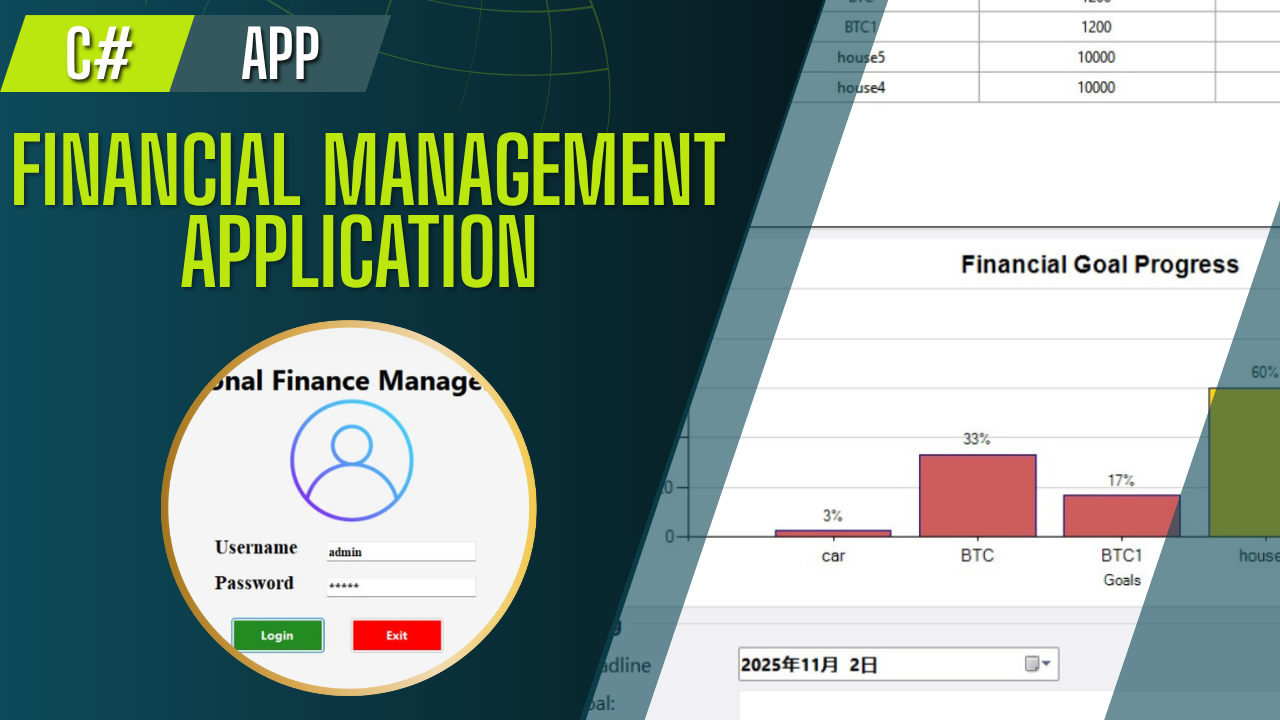
In this blog, we’ll explore a Personal Finance Management application, its features, and how it works. You’ll also get access to a demo video and full source code that you can customize to fit your own requirements.
Introduction
Personal finance management has become increasingly important in today’s economy. While many business applications exist, they often come with subscription fees, privacy concerns, and feature limitations. Building your own finance management application provides complete control over your financial data while providing an excellent opportunity to develop practical programming skills.
This comprehensive guide walks you through building a full-featured personal finance management desktop application using C# WinForms and SQL Server. The application will help users track income, monitor expenses, manage investments and achieve savings goals through an intuitive interface.
Project Overview
Objectives
- Develop a desktop application for comprehensive financial tracking
- Implement secure user authentication and data management
- Create responsive dashboard with real-time financial insights
- Provide transaction categorization and reporting capabilities
- Ensure data privacy and local storage control
Key Functionalities
- User Management: Secure login and profile management
- Income Tracking: Record and categorize income sources
- Expense Management: Track and analyze spending patterns
- Investment Monitoring: Portfolio performance tracking
- Savings Goals: Progress monitoring for financial targets
- Reporting: Financial summaries and export capabilities
project description
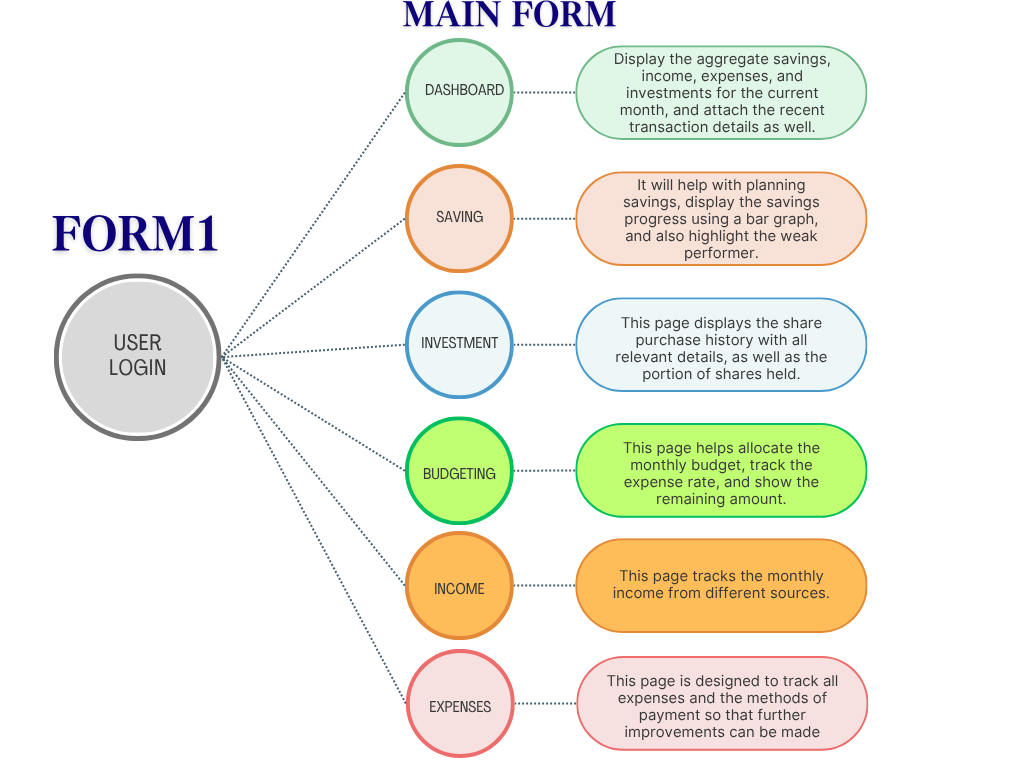
This finance management application consists of two forms: a Login Form and a Main Form.
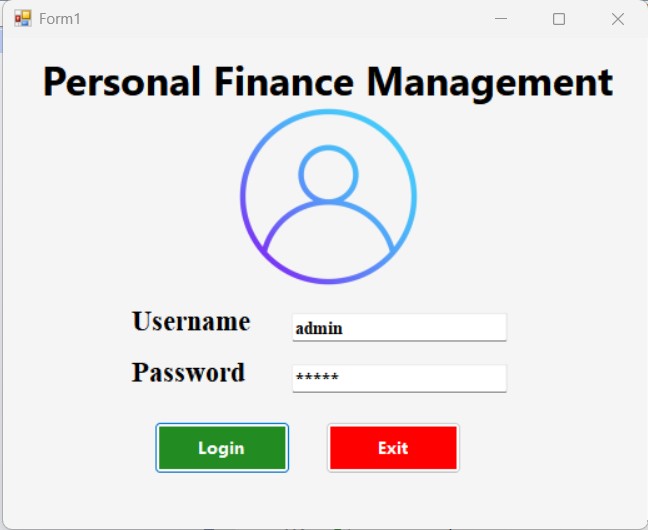
Login form
In the Login Form, if the entered username and password match the credentials stored in the login data table, the user will be granted access to the Main Form.
//login button code
 private void button1_Click(object sender, EventArgs e)
 {
     string username = Username.Text.Trim();
     string password = Password.Text.Trim();

     if (string.IsNullOrEmpty(username) || string.IsNullOrEmpty(password))
     {
         MessageBox.Show("Please enter both username and password.", "Validation Error",
                        MessageBoxButtons.OK, MessageBoxIcon.Warning);
         return;
     }
     string connectionString = AppData.ConnectionString;
     // Try different connection string formats


     // Correct query - Table: logintable
     string query = "SELECT COUNT(*) FROM logintable WHERE username = @Username AND password = @Password";
     try
     {
         using (SqlConnection connection = new SqlConnection(connectionString))
         {
             connection.Open(); // Try opening connection first to test connectivity


             using (SqlCommand command = new SqlCommand(query, connection))
             {
                 command.Parameters.AddWithValue("@Username", username);
                 command.Parameters.AddWithValue("@Password", password);

                 int result = (int)command.ExecuteScalar();

                 if (result > 0)
                 {
                     Form2 form2 = new Form2();
                     form2.Show();
                     this.Hide();
                 }
                 else
                 {
                     MessageBox.Show("Username and password don't match.", "Login Error",
                                    MessageBoxButtons.OK, MessageBoxIcon.Error);
                     Password.Clear();
                     Username.Focus();
                 }
             }
         }
     }
     catch (SqlException sqlEx)
     {
         MessageBox.Show($"SQL Error: {sqlEx.Message}\nError Number: {sqlEx.Number}", "Database Error",
                        MessageBoxButtons.OK, MessageBoxIcon.Error);
     }
     catch (Exception ex)
     {
         MessageBox.Show($"Error: {ex.Message}", "Error",
                        MessageBoxButtons.OK, MessageBoxIcon.Error);
     }
 }
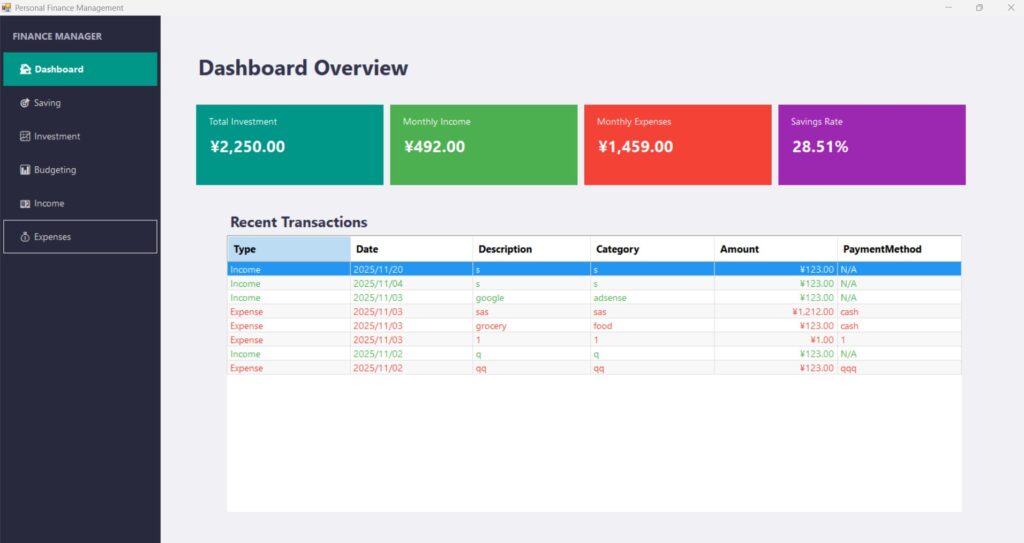
Dashboard
Upon loading the Main Form, the user will see the Dashboard page, which includes a sidebar on the left side for easy navigation to various sections. The dashboard displays cumulative financial data in rectangular boxes, such as Total Investment, Monthly Income, Monthly Expenses, and Savings Rate. It also shows recent income and expense transactions. Green text indicates credit amounts (income), while red text represents expenses.
Saving
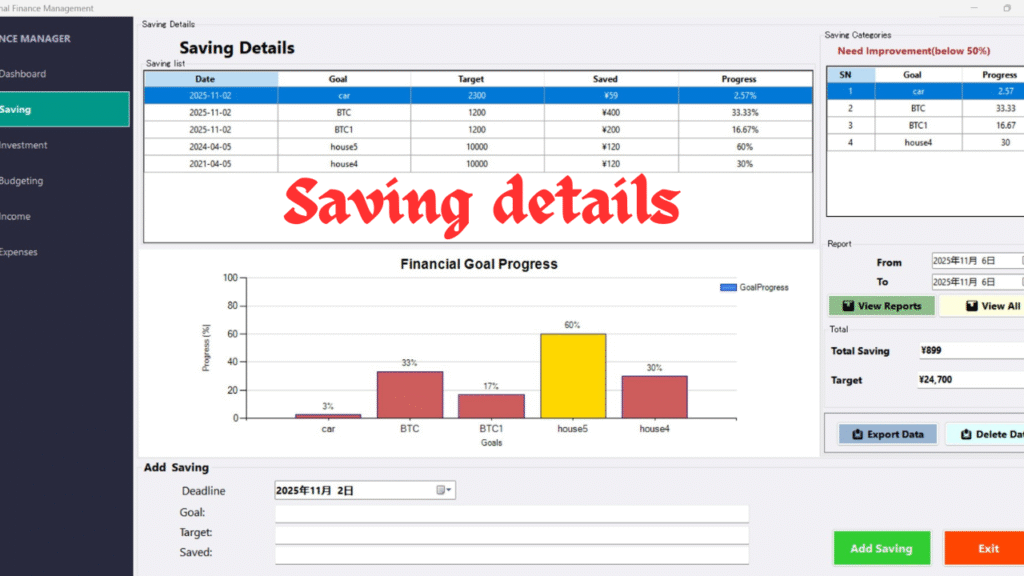
When the Savings option is clicked in the sidebar, the Savings Details page opens. This page contains two data grid views and bar graphs to track saving progress. If savings fall below 50% of the target amount, this will be displayed in the table on the right side, along with the bar graph to visually represent progress. Additionally, users can view monthly saving reports by selecting a date range in the report section. The total savings and target savings are also displayed in text boxes, as shown below.
Investment and Budgeting
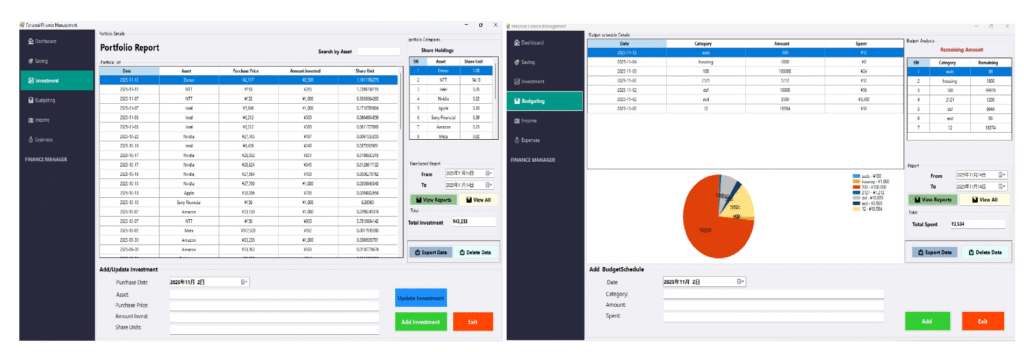
When the Investment option is selected from the sidebar, the Investment page will open. Here, users can view their stock purchase history in the main section, while all cumulative stock holdings are displayed in the right sidebar. Similar to the Savings page, investment data can be viewed for any desired date range, and the information can be exported to a CSV file.
The Budgeting page works in a similar way. Users can view their allocated budget, track remaining balance for each category, and manage their budgeting details. Data can also be exported, and users have the option to add or delete entries as needed.
Income and Expenses
The Income page allows users to record and track all their earnings. Users can view income entries for any selected date range, add new income records, update existing ones, or delete entries. The data can also be exported to a CSV file for reporting or analysis.
The Expenses page works similarly. Users can manage their daily spending, view expenses by category or date range, and monitor where their money is going. Entries can be added, edited, deleted, and exported just like on the Income page, helping users stay in control of their financial habits.
conclusion
In this way, the application enables users to effectively manage their personal financial details, track income and expenses, and gain better control over their spending habits. By using the features of investment tracking, budgeting, savings monitoring, and more, users can make informed financial decisions and work towards their financial goals.
We hope this tutorial has provided you with a clear understanding of how to build and use the application. The source code and demonstration video are attached below for you to explore and implement the project on your own.
Also Read | Classic Snake Game on Pi Pico with Pico Display: A Complete DIY Guide
Download Source Code Click here


Discussion (0)
Share Your Thoughts