

- Introduction
- What Is ML.NET?
- Project Overview
- Step 1: Create a New C# Project in Visual Studio
- Step 2: : Install ML.NET NuGet Packages
- Step 3: Prepare the Sentiment Dataset
- Step 4: Define Input and Output Data Models
- Step 5: Build the ML.NET Training Pipeline
- Step 6: Train the Sentiment Analysis Model
- Step 7: Evaluate the Model
- Step 8: Predict Sentiment for New Text
- Real-World Use Cases
- Conclusion
- Demo
- Source code
Introduction
Have you ever wondered how companies instantly know whether customers are happy or frustrated from their reviews? That’s the magic of sentiment analysis – a natural language processing technique that detects emotions in text.
In this hands-on tutorial, we’ll build our own sentiment analysis application using ML.NET, Microsoft’s powerful machine learning framework for .NET developers. No Python required – we’re doing everything in C#!
What Is ML.NET?
ML.NET is an open-source, cross-platform machine learning framework developed by Microsoft. It allows .NET developers to build, train, and deploy machine learning models using C# without switching to Python or other languages.
In this project, ML.NET will be used to:
- Load text-based sentiment data
- Train a binary classification model
- Predict sentiment for new text inputs
Project Overview
The sentiment analysis application will follow these steps:
- Load pre-defined sentiment data (positive and negative text)
- Train a machine learning model using ML.NET
- Evaluate the model’s performance
- Predict sentiment for new user input
The sentiment of new text will be measured based on the data previously fed to the application.
Step 1: Create a New C# Project in Visual Studio

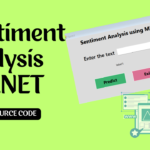
Create a new form design as shown in the figure. The textbox allows the user to enter text, and Label1 is used to display the result. After entering data into the textbox and clicking the Predict button, the entered data is compared with the stored data, and a decision is made indicating either a positive or negative result.
Step 2: : Install ML.NET NuGet Packages
You’ll need to install the main ML.NET library. In Visual Studio:
- Right-click the project → Manage NuGet Packages.
- Search for Microsoft.ML.
- Click Install.
This package gives you access to all core ML.NET functionality.

Step 3: Prepare the Sentiment Dataset
TIn this step, we prepare the training data that teaches the model what “positive” and “negative” sentiment look like.
What happens conceptually
The model learns patterns (words, combinations, frequency) associated with each sentiment.
Each data entry contains:
Text → the sentence
Label → sentiment (true = Positive, false = Negative)
 private void TrainModel()
 {
     _mlContext = new MLContext();

     // Step 1: Load Data
     var trainingData = new List<SentimentData>
     {
         new SentimentData { Text = "This is a great product", Label = true },
         new SentimentData { Text = "I love this software", Label = true },
         new SentimentData { Text = "The user interface is amazing", Label = true },
         new SentimentData { Text = "Best experience ever", Label = true },
         new SentimentData { Text = "This is terrible", Label = false },
         new SentimentData { Text = "I hate this bug", Label = false },
         new SentimentData { Text = "Very poor quality", Label = false },
         new SentimentData { Text = "Do not buy this", Label = false }
     };

     IDataView dataView = _mlContext.Data.LoadFromEnumerable(trainingData);

     // Step 2: Build Pipeline
     var pipeline = _mlContext.Transforms.Text.FeaturizeText(outputColumnName: "Features", inputColumnName: nameof(SentimentData.Text))
         .Append(_mlContext.BinaryClassification.Trainers.SdcaLogisticRegression(labelColumnName: "Label", featureColumnName: "Features"));

     // Step 3: Train
     var model = pipeline.Fit(dataView);

     // Step 4: Create Prediction Engine (stored in variable for reuse)
     _predictionEngine = _mlContext.Model.CreatePredictionEngine<SentimentData, SentimentPrediction>(model);
}Step 4: Define Input and Output Data Models
ML.NET requires strongly typed classes to understand:
- What data it receives
- What data it outputs after prediction
Input model (SentimentData)
public class SentimentData
{
    [LoadColumn(0)] public string Text { get; set; }
    [LoadColumn(1)] public bool Label { get; set; }
}Purpose:
Label → actual sentiment (used only during training)
Text → input sentence
Output model (SentimentPrediction)
public class SentimentPrediction : SentimentData
{
    [ColumnName("PredictedLabel")]
    public bool Prediction { get; set; }
    public float Probability { get; set; }
    public float Score { get; set; }
}
Step 5: Build the ML.NET Training Pipeline
The pipeline defines how raw text becomes a trained model.
What the pipeline does
- Converts text into numerical features
- Applies a binary classification algorithm
- Learns patterns from labeled data
How this appears in your code
var pipeline = _mlContext.Transforms.Text.FeaturizeText(
                    outputColumnName: "Features",
                    inputColumnName: nameof(SentimentData.Text))
    .Append(_mlContext.BinaryClassification.Trainers
        .SdcaLogisticRegression(
            labelColumnName: "Label",
            featureColumnName: "Features"));
- FeaturizeText
- Converts words into numeric vectors
- Handles tokenization, normalization, and word frequency
- SdcaLogisticRegression
- Binary classifier (Positive vs Negative)
- Efficient for small-to-medium datasets
This pipeline is a recipe that ML.NET follows during training.
Step 6: Train the Sentiment Analysis Model
Training means feeding the data through the pipeline so the model can learn.
How training works
- ML.NET analyzes word patterns
- Associates them with positive or negative labels
- Builds internal weights for prediction
Code responsible for training
var model = pipeline.Fit(dataView);At this point:
- The model is fully trained
- It exists in memory
- It can now be used for prediction
Step 7: Evaluate the Model
OnConceptually
Evaluation measures:
- Accuracy
- Confidence
- Overall reliability on unseen data
In your current code
Your project does not explicitly evaluate the model using a test dataset.
Instead:
- You rely on Probability and Score during prediction
- This is acceptable for:
- Learning
- Small demo applications
- UI-based sentiment testing
In production systems, evaluation would be done using:BinaryClassification.Evaluate() with separate test data.
Step 8: Predict Sentiment for New Text
This is where the trained model is actually used by the user interface.
Creating the prediction engine
_predictionEngine = _mlContext.Model
.CreatePredictionEngine<SentimentData, SentimentPrediction>(model);Converts user input into predictions
Reused for every button click
Making a prediction
var result = _predictionEngine.Predict(
new SentimentData { Text = txtInput.Text });Displaying the result
string sentiment = result.Prediction ? "Positive 😊" : "Negative 😞";
lblResult.Text = $"Sentiment: {sentiment} \nConfidence: {result.Probability:P2}";
Real-World Use Cases
This sentiment analysis application can be extended for:
- Customer review analysis
- Feedback systems
- Social media sentiment tracking
- Chatbot emotion detection
- Product rating automation
Conclusion
In this tutorial, we explored how to structure a Sentiment Analysis application using ML.NET in C#. By training the model with pre-given data, the application can intelligently classify text as positive or negative.
ML.NET makes machine learning accessible to C# developers, allowing seamless integration into existing .NET applications.
Demo
Source code
Click here to download the source code.
Also Read | How to Create a Finance Management app in C#

Discussion (0)
Share Your Thoughts